Chances of accidents and collisions increase ten folds in snow storms or chilly climates. Sometimes, it might take a car a few hours – or even an entire day – to escape from a particularly dense snow blanket!
Installing chains on tires for snow is arguably one of the best lifesavers for drivers in these cases. Keep scrolling for more take on how to put it on.
In this article:
How to Install Chains on Tires?
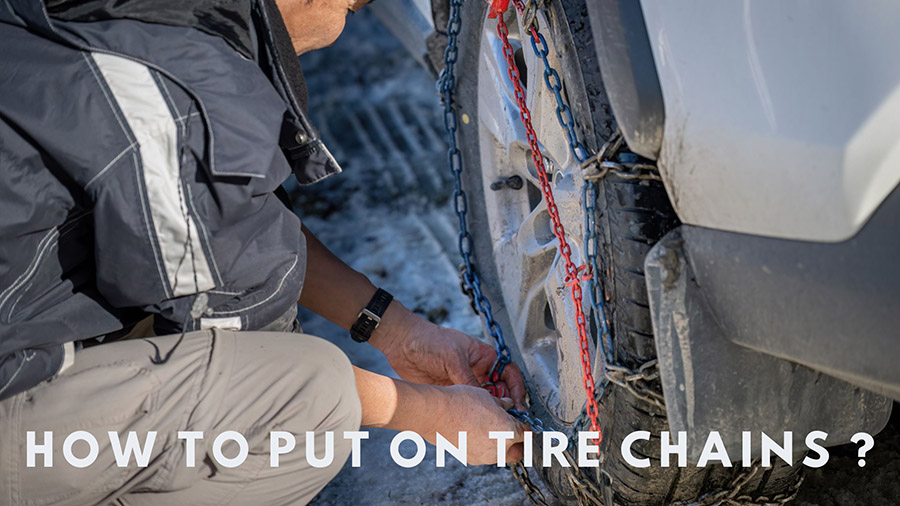
Fit the chain over the tire top. Tuck the chain underneath, then drive your car forward (a few meters) to uncover the tire’s unfitted portion. Cover it with the rest of the chains and ensure the links are well-aligned.
Step 1. Purchase Chains That Suit Your Tires’ Size Measurements
Before starting, identify the tire size to assess which chains work best for your cars; this information can prove extremely critical during your shopping.
Look at the tire’s outside edge and spot its long number/letter strings:
- First number: The width
- Second number: the height ratio (between the sidewall and the width)
- Third number: the wheel’s diameter, mostly measured in inches

Pitch these numbers against the chain packaging, and you can easily spot a chain that fits these tires best. If you feel overwhelmed by the diverse options, feel free to ask for help from the store employees.
Step 2. Remove Your Chain From The Package. Untangle Its Links
Are there any metal kinks or twists? Undo them to ensure the chains hang freely in web shapes. Since the entire process can take much longer than expected, waiting until emergencies arrive is a bad idea; it would be best to prepare and put the chains on beforehand.
Step 3. Lay The Chain Down Next To Your Car Tires
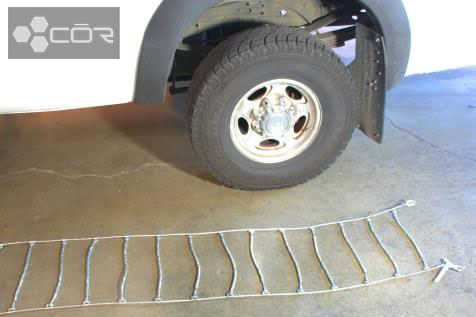
Assess which drive systems your car is currently engaged in:
- FWD (front-wheel drive vehicles): The chains should be on your front wheels
- RWD (rear-wheel drive vehicles): Put them on the rear wheels
- 4WD (four-wheel drive) or AWD (all-wheel drive): Install the chain on every tire
During extreme conditions, putting the chains on all tires for FWD or RWD is also highly recommended; they can give the car better control and safety that way.
Step 4. Fit The Chain Over The Snow Tire’s Top
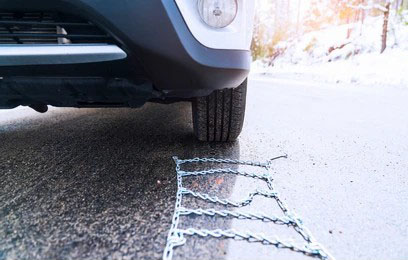
Ensure the parking brakes are engaged and your vehicle is switched to Park mode before proceeding:
- Straighten the chain’s length over the tire’s top, making it hang along the tire sides. About 3/4 of your tire should be covered at this point.
- Ensure the chain running across the tire’s width is also straight.
- Tuck your chain between the ground and the tire’s bottom to keep them securely on the spot when the car drives forward.
- Certain snow chain types arrive with fastened rings, which align with the drive wheel’s inside to rest on the tire’s bottom during installation. Hence, I suggest getting below the car for better setup and modifications; keep adjusting until the chain is straight.
Step 5. Drive The Car Forward to Reveal The Tire’s Unfitted Portion
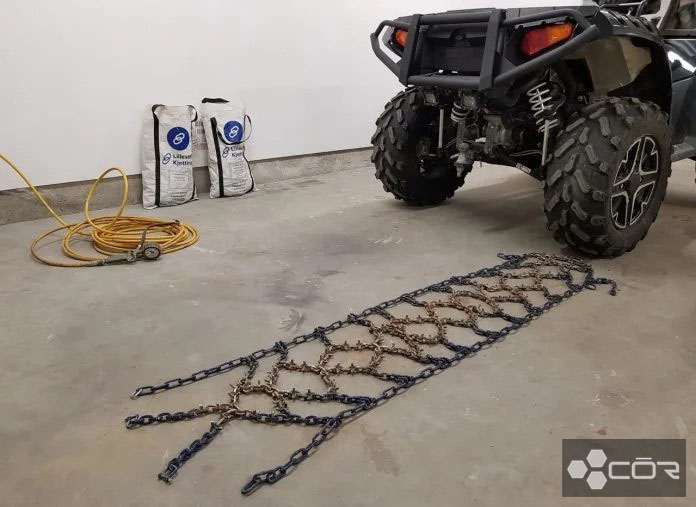
Look around to check whether the surroundings are safe for the task. Once ascertained, disengage the brake, put your car in gears, and roll slightly forward.
Since only a very small tire portion is unfitted, there’s no need to drive far. Just moving forward a few meters is enough.
Step 6. Turn Your Wheels Toward The Car’s Inside For Better Access
Now that you have pulled the car forward and ensured the tire’s full coverage, turn the wheels toward the car’s inside. It will gain you much more open access to the tire’s connections and pave the way for faster chain securing.
- If the chains are installed on the two left tires, spin the wheel inwards to your right.
- If the chains are set up on the two right tires, rotate the wheel inwards to your left.
Return the car to “Park,” then engage the brake again.
Step 7. Link The Chains To Cover The Tire’s Remaining Portions
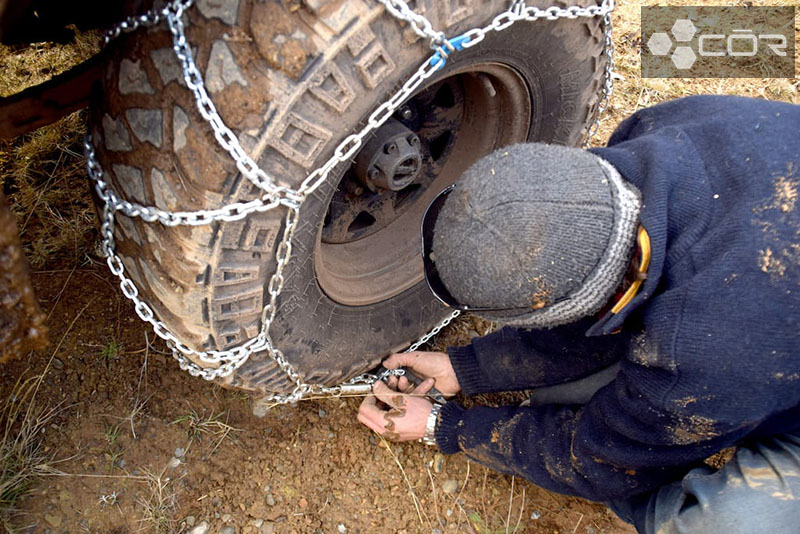
Start from the tire’s inner part (close to the axle) and connect the hooked edges. Once done, continue to hook these edges to the tire’s outside portion; rotate or tighten the cam/closer link to make them fit as snugly as possible.
For traditional chains, using link-tightening tools is acceptable. Don’t use them on chains with link units, though: bungee cords with fasteners are a far better instrument to tighten the chains on the tires.
They are often sold in the same stores as snow chains, so you don’t have to worry about not finding one.
Step 8. Confirm The Outer and Inner Connections Are Aligned
Double-check to confirm these chains go straight across your tire’s width. If the chain’s inner portions are tight – but the outer is loose – adjust the chain on both sides to straighten them up. Re-tighten all parts to seal the deal.
Step 9. Perform The Same Steps To The Car’s Other Tires
Apply the above step instructions on your remaining tires:
- Fit the tire snow chain over the tire top
- Tuck the chain underneath, then drive the car forward a little to uncover the tire’s unfitted portion.
- Connect all the chains, ensuring they are well-aligned across your tire.
My guide is mostly for beginners, hence the importance of tightening each tire one by one. But once you have gained more experience in the future, installing chains simultaneously on both rear tires and front tires will be a piece of cake. Imagine how much time and effort you could save!
Step 10. Drive The Car Forward and Tighten The Chain One Last Time
Drive the car forward once all the chains are properly installed. After about 1-2 minutes, park the car and double-check the chains, pulling them tight and removing the slacks (if any).
With the chains on the tires, keep your driving speed slow throughout the rest of the trip.
Extra: Do This Before You Embark On Any Trip
Snow chains are mostly needed in extreme driving conditions: pouring snow, heavy traffic, dripping dirty water, slick roads, and dark hours. Hence, as mentioned above, do not just start learning to put the chains on when you are already stuck in these situations.
- Practice how to install snow chains on the tires before your travel. Use the driveway or dry garage as your practice area, making sure the chains fit the tire sizes just well and there are no significant issues during the setup. If needed, ask for professional help.
- Prepare simple winter safety kits, waterproof layers, warm gloves, and other preventive items to smooth your winter rides. Always carry them in your car’s trunk for the rest of the winter months.
How to Remove Snow Chains
Rolle the car forwards to make the fasteners spread across the wheel’s top. Once done, unfold your snow chains and lay them on the floor. Repeat these steps for the other tire chains, then pick them up and pack all your chains away.
When to Use Snow Chains
Use snow chains when your car has to traverse terrains with fully packed ice and snow or slippery and steep conditions to help your tire dig in the snow and increase the grip to the road. Using it on paved roads is a big NO.
Before driving, it would be best to practice installing/removing them first, so that you do not feel lost when the time these chains are needed finally arrives.
Uninstalling them when the roads are cleared – or if you decide to drive beyond 30 MPH (miles per hour).
See more: Do You Need Chains On All Four Tires?
How to Store Snow Chains
Heavy-duty or canvas bags are the best containers for these snow chains when they are not installed. Also, use zip-ties or chain racks to keep them from getting tangled; spending hours untwisting them is quite a nightmare!
Can Snow Chains Damage Brakes?
Yes – although they are, thankfully, not a common case. According to some drivers, the chains likely confuse the control system and sensors, which leads to minor malfunctions in the car’s ABS.
Conclusion
Remember only to use snow chains when they are absolutely necessary (extreme weather, icy conditions, heavy snow blankets, etc.). Otherwise, installing them on clear roads might compromise their intended benefits and corrode the car’s braking system.
If you still feel unsure about the chain installation, remember my support team is always here. Inbox us or leave comments.
For more: How much do chains cost?

